Simple Sides: Butternut Apples!
By Dennis Linden
In this country children consume an estimated 12 percent of their calories from fast food and 20 percent of all American meals are eaten in the car! The consequences are predictably unhealthy. Competing schedules in the day-to-day lives of a busy modern family make it difficult to share a home-cooked meal together, but not impossible. In fact, with a little planning, cooking together can become a fun family event and learning opportunity. This feature will focus on providing a child or a group of children, working together under the supervision of an adult, with one uncomplicated, healthy and delicious side dish recipe. The dishes will be centered on seasonal fresh produce items; the recipes will always contain tasks will allow even the youngest kitchen helper to contribute to the family meal. Parents should always read through each recipe carefully to judge the division of labor based on age and ability as well as to identify where adult attention might be especially needed.

Many of the recipes presented here will seem very basic, this is by design. It is hoped that these simple preparations will provide the culinary foundation and confidence to inspire kids to try more challenging recipes as their experience and confidence in the kitchen develops. Melissa’s encourages parents to find the time to gather as a family unit at least once a week for a dinner that everyone pitches in to prepare. It’s a wonderful way to teach a child basic culinary skills and, more importantly, cooking with your children will build memories in all of your hearts forever. “No one is born a great cook, one learns by doing” – Julia Child.
September signals the beginning of the fresh apple harvest in many northern states across the country. Here’s a fun recipe to prepare with your young kitchen helpers that uses of one of the first, and sweetest, varieties of the new crop, the Honeycrisp. This very simple recipe fills this sweet, semi-firm varietal with the nutty, creamy rich goodness of Butternut squash to create a side dish with dessert-like characteristics that the whole family will enjoy. Moreover, the dish will expose your young sous chefs to a number of basic cooking skills, including learning how to handle a pastry piping bag!
The Honeycrisp, which tends to be large in size, is perfect for this dish. The bigger the apple / the bigger the apple bowl! As its name suggests, while this variety is especially high in sugar content it is also surprisingly firm in texture and crispiness compared to other late summer/early fall varieties. Though lacking the snap one gets biting into a Red Delicious or Fuji, the variety is still firm enough to hold its shape and structure during the baking process. Plus, when baked, its sweet flavor deepens as the fruit’s sugary juices caramelize.
Have your kitchen assistants core and then form cups from the apple halves using a melon baller; even your youngest can do little damage to fruit or self with this benign culinary tool. The tough core and seeds are easily removed and making the little cups is, as they say, safe child’s play. Apple prep tip: it may take a little time for your helper(s) to prep the apples, so have a large bowl of lemon-water standing by for both the retained fruit pulp as well as each finished apple “bowl” to prevent them from browning up from exposure to air. Apple varieties with a high sugar content tend to brown up quickly. In fact, there’s a ready-made science lesson in this process for the kids if you want to sacrifice another cut apple that is not put in the lemon water for comparison of how quickly an unprotected apple can brown.
While this time of year is also fresh hard squash season, what keeps this preparation moving along for young, easily distracted minds is the convenience of Melissa’s packaged Peeled & Steamed Butternut squash. Not to mention that interesting looking pastry piping bag sitting next to the package! Anyway, the squash is ready to use right out of the box, taking a good hour off cooking time with no sacrifice in flavor. The precooked squash just needs to be heated up in order to blend in the agave, apple juice and retained fruit pulp. If your helper is especially young, use a chair pulled up next to the stove as “training wheels”, a long-handled spoon and extremely close supervision to create one of those traditional first-time culinary experiences -- embrace the moment!
Once the apples are finished baking and the heated squash mixture has been puréed, the fun begins! Let your helper load the pastry bag. While the learning curve using this simple kitchen tool won’t take long, a little practice time should be allowed. To conserve the filling, I always practice piping into a shot glass so it can be returned to the bag when I’m ready for the LIVE piping.
The garnish of both the syrup-like cider residue gleaned from the apple baking pan as well as a sprinkle of cinnamon should not be overlooked and, in fact, treated as a part of the preparation like all the rest of the steps. Your aspiring chefs should be taught early that garnish is as important an ingredient as any other in a recipe. Since garnish is both visible and always edible, it also contributes another flavor to the mix that must pair with the rest. Besides, insisting that your helpers “finish” this or any dish with a touch of artistic – and flavorful – flair underscores the fact that we do not eat blindfolded so eye appeal is also another vital ingredient to be taught early and often. Happy apple harvest!
Butternut Squash Stuffed Apples
Serves 4

Ingredients
2 Honeycrisp Apples, halved lengthwise
12 oz. fresh apple cider or unfiltered apple juice, divided
2 TBS Melissa’s Organic Blue Weber Agave Syrup
2 pkg Melissa’s Peeled & Steamed Butternut Squash
1 TBS butter
1/8 teaspoon salt
1 TBS ground cinnamon
What the kids can do:

Slice each apple in half across the middle. Use a melon baller to cut out the core/seeds, then scoop out more of the fruit pulp to form small apple “bowls”. Save the removed fruit. Place the apple bowls into a baking dish. Whisk together 8 oz. of the apple cider and agave nectar, then pour over the apples. Bake for 30 minutes at 325°, basting the apples at least once with the sweetened cider in the dish.
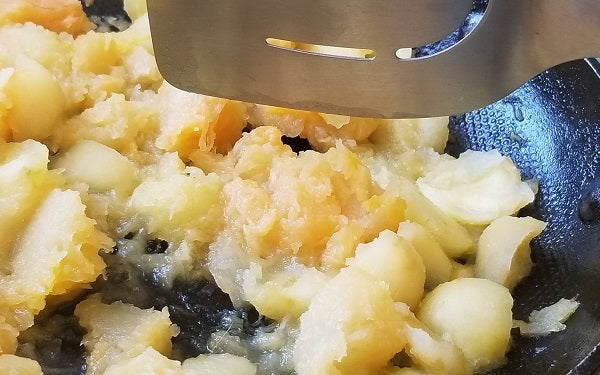
While the apples are baking, melt the butter in a sauté pan over a medium low heat, then add the squash, reserved apple pulp, and the remaining cider and sauté, covered, for 15 minutes. Stir occasionally so the mixture does not stick or burn.

Let the squash mixture cool for a few minutes uncovered before transferring to a food processor, adding the salt and blending until smooth. Transfer the squash mixture to a pastry bag and pipe into the apples.
What the supervising adult should do:
Depending on the age of your helper, oversee the slicing of the apples as well as and stovetop heating of the squash. Have that big bowl of lemon water ready for the sliced apples. Handle removing the baked apples from the oven and testing the hot squash before the kids spoon it into the piping bag.
Plating:
If the cider in the baking dish has not thickened, pour it into a small pot and bring to a fast simmer for 1 minute to thicken it. Pour the thickened cider over each stuffed apple half and sprinkle each with cinnamon.
In this country children consume an estimated 12 percent of their calories from fast food and 20 percent of all American meals are eaten in the car! The consequences are predictably unhealthy. Competing schedules in the day-to-day lives of a busy modern family make it difficult to share a home-cooked meal together, but not impossible. In fact, with a little planning, cooking together can become a fun family event and learning opportunity. This feature will focus on providing a child or a group of children, working together under the supervision of an adult, with one uncomplicated, healthy and delicious side dish recipe. The dishes will be centered on seasonal fresh produce items; the recipes will always contain tasks will allow even the youngest kitchen helper to contribute to the family meal. Parents should always read through each recipe carefully to judge the division of labor based on age and ability as well as to identify where adult attention might be especially needed.
Many of the recipes presented here will seem very basic, this is by design. It is hoped that these simple preparations will provide the culinary foundation and confidence to inspire kids to try more challenging recipes as their experience and confidence in the kitchen develops. Melissa’s encourages parents to find the time to gather as a family unit at least once a week for a dinner that everyone pitches in to prepare. It’s a wonderful way to teach a child basic culinary skills and, more importantly, cooking with your children will build memories in all of your hearts forever. “No one is born a great cook, one learns by doing” – Julia Child.
September signals the beginning of the fresh apple harvest in many northern states across the country. Here’s a fun recipe to prepare with your young kitchen helpers that uses of one of the first, and sweetest, varieties of the new crop, the Honeycrisp. This very simple recipe fills this sweet, semi-firm varietal with the nutty, creamy rich goodness of Butternut squash to create a side dish with dessert-like characteristics that the whole family will enjoy. Moreover, the dish will expose your young sous chefs to a number of basic cooking skills, including learning how to handle a pastry piping bag!
The Honeycrisp, which tends to be large in size, is perfect for this dish. The bigger the apple / the bigger the apple bowl! As its name suggests, while this variety is especially high in sugar content it is also surprisingly firm in texture and crispiness compared to other late summer/early fall varieties. Though lacking the snap one gets biting into a Red Delicious or Fuji, the variety is still firm enough to hold its shape and structure during the baking process. Plus, when baked, its sweet flavor deepens as the fruit’s sugary juices caramelize.
Have your kitchen assistants core and then form cups from the apple halves using a melon baller; even your youngest can do little damage to fruit or self with this benign culinary tool. The tough core and seeds are easily removed and making the little cups is, as they say, safe child’s play. Apple prep tip: it may take a little time for your helper(s) to prep the apples, so have a large bowl of lemon-water standing by for both the retained fruit pulp as well as each finished apple “bowl” to prevent them from browning up from exposure to air. Apple varieties with a high sugar content tend to brown up quickly. In fact, there’s a ready-made science lesson in this process for the kids if you want to sacrifice another cut apple that is not put in the lemon water for comparison of how quickly an unprotected apple can brown.
While this time of year is also fresh hard squash season, what keeps this preparation moving along for young, easily distracted minds is the convenience of Melissa’s packaged Peeled & Steamed Butternut squash. Not to mention that interesting looking pastry piping bag sitting next to the package! Anyway, the squash is ready to use right out of the box, taking a good hour off cooking time with no sacrifice in flavor. The precooked squash just needs to be heated up in order to blend in the agave, apple juice and retained fruit pulp. If your helper is especially young, use a chair pulled up next to the stove as “training wheels”, a long-handled spoon and extremely close supervision to create one of those traditional first-time culinary experiences -- embrace the moment!
Once the apples are finished baking and the heated squash mixture has been puréed, the fun begins! Let your helper load the pastry bag. While the learning curve using this simple kitchen tool won’t take long, a little practice time should be allowed. To conserve the filling, I always practice piping into a shot glass so it can be returned to the bag when I’m ready for the LIVE piping.
The garnish of both the syrup-like cider residue gleaned from the apple baking pan as well as a sprinkle of cinnamon should not be overlooked and, in fact, treated as a part of the preparation like all the rest of the steps. Your aspiring chefs should be taught early that garnish is as important an ingredient as any other in a recipe. Since garnish is both visible and always edible, it also contributes another flavor to the mix that must pair with the rest. Besides, insisting that your helpers “finish” this or any dish with a touch of artistic – and flavorful – flair underscores the fact that we do not eat blindfolded so eye appeal is also another vital ingredient to be taught early and often. Happy apple harvest!
Butternut Squash Stuffed Apples
Serves 4
Ingredients
2 Honeycrisp Apples, halved lengthwise
12 oz. fresh apple cider or unfiltered apple juice, divided
2 TBS Melissa’s Organic Blue Weber Agave Syrup
2 pkg Melissa’s Peeled & Steamed Butternut Squash
1 TBS butter
1/8 teaspoon salt
1 TBS ground cinnamon
What the kids can do:
Slice each apple in half across the middle. Use a melon baller to cut out the core/seeds, then scoop out more of the fruit pulp to form small apple “bowls”. Save the removed fruit. Place the apple bowls into a baking dish. Whisk together 8 oz. of the apple cider and agave nectar, then pour over the apples. Bake for 30 minutes at 325°, basting the apples at least once with the sweetened cider in the dish.
While the apples are baking, melt the butter in a sauté pan over a medium low heat, then add the squash, reserved apple pulp, and the remaining cider and sauté, covered, for 15 minutes. Stir occasionally so the mixture does not stick or burn.
Let the squash mixture cool for a few minutes uncovered before transferring to a food processor, adding the salt and blending until smooth. Transfer the squash mixture to a pastry bag and pipe into the apples.
What the supervising adult should do:
Depending on the age of your helper, oversee the slicing of the apples as well as and stovetop heating of the squash. Have that big bowl of lemon water ready for the sliced apples. Handle removing the baked apples from the oven and testing the hot squash before the kids spoon it into the piping bag.
Plating:
If the cider in the baking dish has not thickened, pour it into a small pot and bring to a fast simmer for 1 minute to thicken it. Pour the thickened cider over each stuffed apple half and sprinkle each with cinnamon.